Showing posts with label crafting. Show all posts

Friday, June 24, 2011

Blog Favs -- DIY Home Decor To Do

Here's another series I had in mind to start....My Blog Favs, where I plan to share my favorite diy blog posts.  Projects that I plan to make or just dream about making...

First up...

theartofdoingstuff.com
She made these cheap and easy Glowing Outdoor Orbs with nothing more than old light globes you can find at thrift stores or even at Lowe's or Home Depot, then she just added mini christmas lights.   Go check out her site for full details and to browse all of her amazing projects.

Second is this...
Sissorsandspatulas.com
I loveeeee Jennifer's blog...she has soooo many awesome diy projects, and super tutorials, very easy to follow.   As soon as I saw this Summer Wreath she made, I had to make one for myself.  In fact, I've already started it, I'll be sure to post pics of it when it's finished (don't expect it to look nearly as great as hers).

Her blog is in my top 5 favs, so trust me, go check her out.

Do you have any favorite blogs or diy projects you'd like to share...I'm always looking for ideas, so let me know. 

Wednesday, June 15, 2011

Baby Girl Shower Menu featuring Strawberry Truffles, Edible Butterflies and Pearls

If you haven't been following along this past week with my other baby shower posts, you might want to check them out as well...


While looking around etsy for shower ideas, I found a few more absolutely ah-maz-ing etsy artisans.
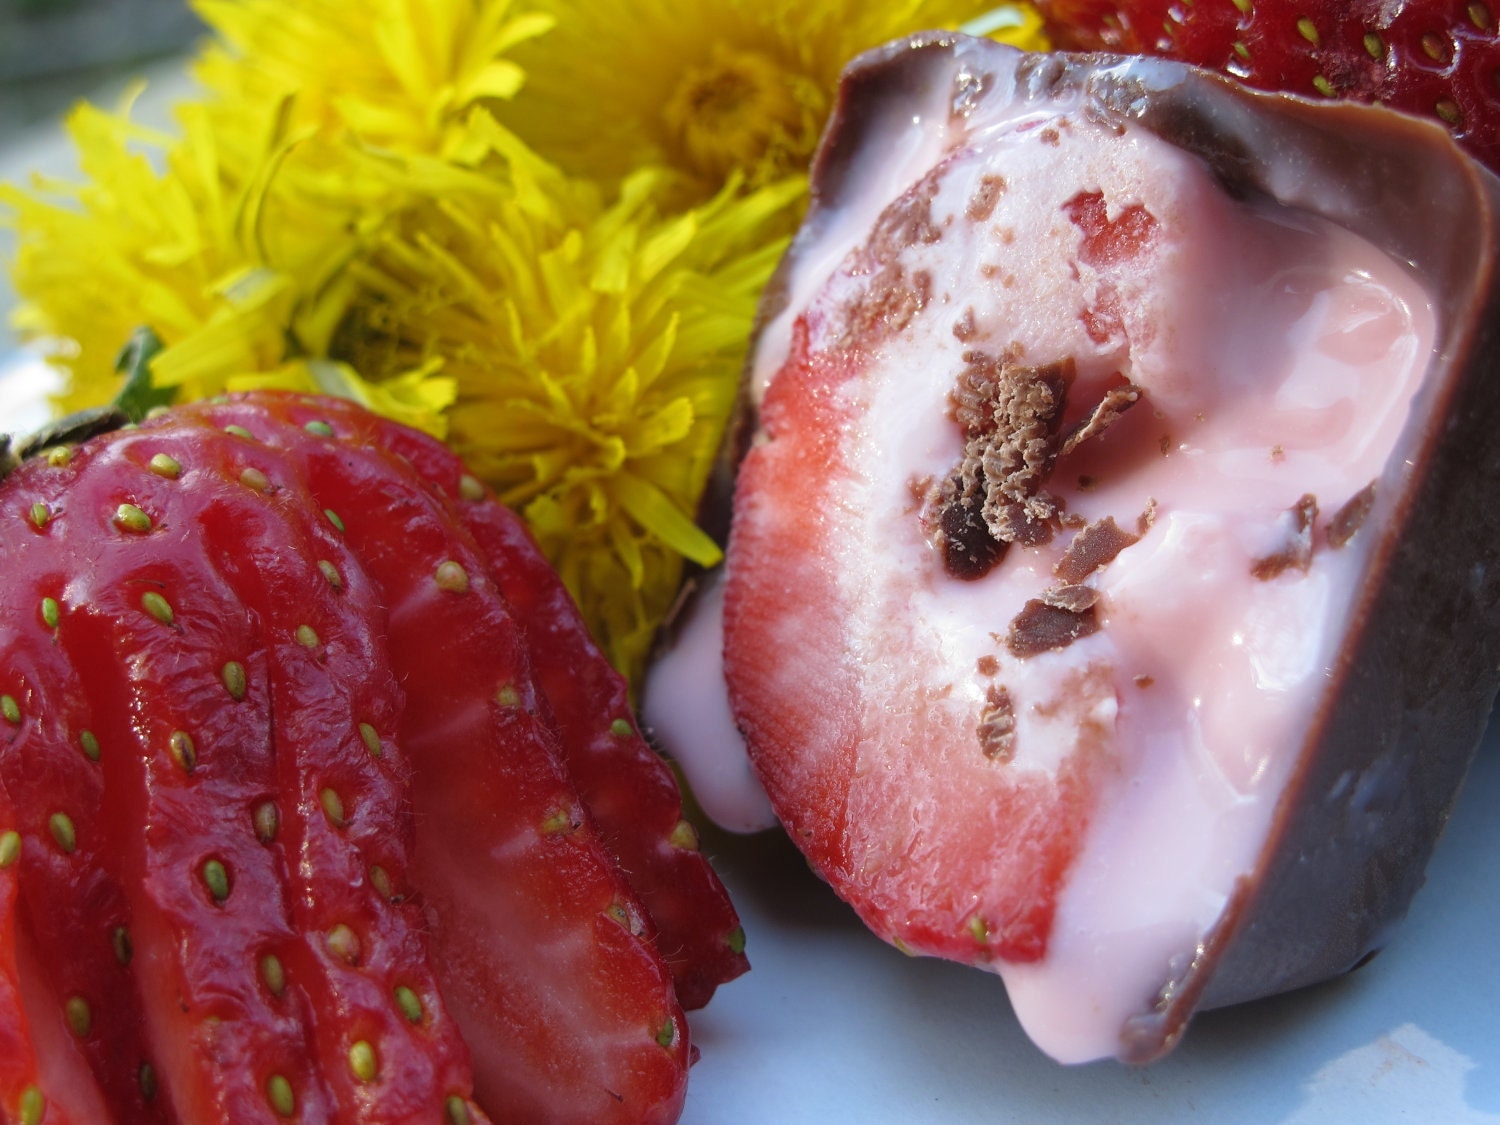
These Chocolate-Covered Strawberry Truffles were special ordered from amays3402 etsy shop, and were placed on a tall white metal filigree stand purchased from HL.

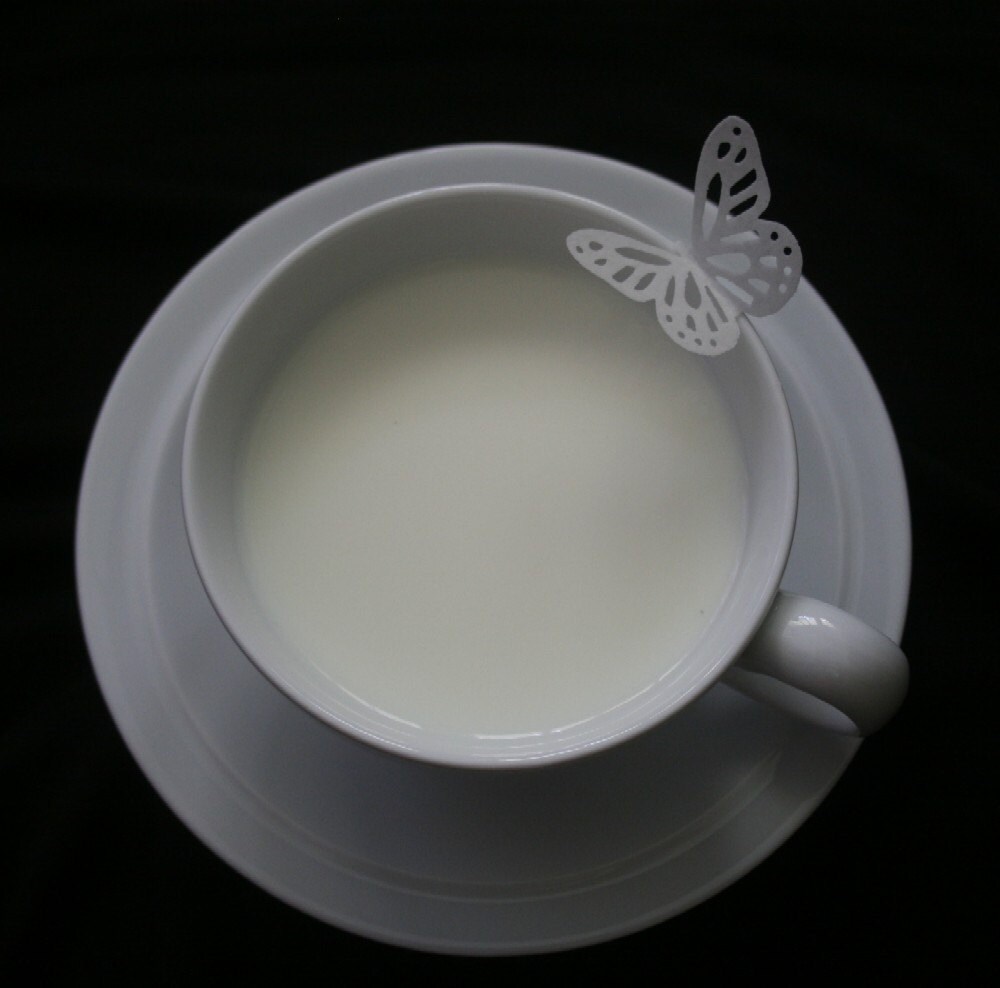
The cupcakes were ordered from our local bakery,  and I decided on pink icing.  Then I found etsy shop sweetdejavu who makes Edible Butterflies
and Edible White Sugar Pearls
pearls. (the butterflies come in different colors, styles and sizes...and the pearls come if different colors) The following 2 photos are from the item listings, not from the baby shower.


Here is how we used them....


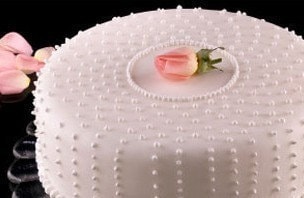
And though we served cupcakes for everyone, I decided to have a very small cake made for the "mommy-to-be"....I added a few of the edible butterflies to the center of the top, and pearls were placed randomly all over (I'm really regretting that we did not get a close-up pic of it, it was gorgeous).  I also scattered a few of the butterfly cut-outs that my sister made with her Cri-cut and scrapbook paper, around the edges of the plate. 
We displayed it on "mommy-to-be's" table in a vintage etched-glass cake plate that was my grandmother's.


The Menu included:
Bite-size buns, also from the local bakery filled with Pimento Cheese Spread, Smooth Chicken Salad and Chunky Chicken Salad
Vegetable Pizza
Macaroni Salad
Fruit Salad

We served a Strawberry Punch and Raspberry Ice Crystal Lite.

We found small 1" plastic babies at HL and froze each one in an ice cube, added an ice cube to each guests punch glass and whoever's baby was "born" (melted out of the ice cube) first won a prize!

We also placed glass candy dishes on each table filled with assorted nuts and handmade ButterMint Baby Booties...


If you are looking for any kind of party planning ideas...go to Etsy's website and type any word you are searching in the search bar (ie. baby, boy, girl, wedding, anniversary) and you will find so many ideas from all the etsy artisans you'll have your event planned in no time at all!!!
Linking up to these blog parties....go check out all the great ideas in blogland...


Tuesday, June 14, 2011

Baby Girl Shower Invitations and Branch Centerpiece DIY Tutorial

front of invitation

I made the baby shower invitations using the online website Mixbook where you can upload your own photos and edit them, upload your own scrapbook papers and elements to design your own cards, photo books, and calendars.  You can also invite other family members to help out with the albums.   I have made photo albums to give as gifts and am currently working on getting all our family photos put into albums.

In keeping with the "Princess" theme, I titled the front of the invitation "Preparing for a Princess" and I added pics of Miranda, her belly, and an ultrasound.  The back of the invitation had all the details for the shower itself.

I have enjoyed scrapbooking in the past but have found that I prefer the unlimited artistic options by going digital.  Every single background, element and every text was put into place and edited by me.   If you've never tried it but would like to, let me warn you, it can become very addicting...
back of invitation

I've also recently found the online photo editing site Picnik and have just started playing around with it, and so far I'm in "LLLLOVVVVEEEE" with it.  I used it on the back of the invitation to "pixelate" Miranda's last name and the RSVP phone number, I'm not that great at it, but I'll only get better with practice :)

Now for the Branch Centerpiece DIY Tutorial:


The food table featuring the branch centerpiece (I wish we would have taken the pic after we cleaned off the bar in the background)


I started with dead, bare branches that had fallen in our yard out of the large maple tree that drops them every time a wind storm blows through.  I picked the ones that were the most appealing to me.  I then purchased from Michael's a couple of containers of small fabric flowers, Martha Stewart Glittering Glue & Lustre Glass MicroBeads in White Gold.

I proceeded to add the glittering glue to the center of some of the flowers, then sprinkled the microbeads onto it, shaking off the excess...
Some of the smaller flowers, I layered with hot glue.  I also found the tall pink tin can at Michael's and stuffed it with wadded up newspaper to provide support for the branches.  I arranged the branches into the newspaper then used my hot glue gun to attach the flowers randomly.

To finish it off, I added a white feather boa that was purchases at Hobby Lobby to the top of the tin pot.  We plan to place this in the nursery for decoration but I think I'm going to have to cut the size down quite a bit.   To get this to the shower, I had to remove the branches from the tin, and lay them flat in the back of my SUV (the branches were so big, I had to lay the back seats down for them to fit), then I just rearranged it back together at the shower.  It was honestly so easy to do.
I used very little of the glue and microbeads, so I'll have them for another project, so this really only cost me the price of the tin pot, the feather boa and the flowers, probably around $22.

Nate Berkus always says to use things from nature and I think this fits that bill nicely, if the branches get broken, they are very easy to replace, and cost nothing because you can reuse the flowers.

If you missed the other posts about the baby shower, go check them out...


Keep watch this week for an awesome interview and giveaway from an amazing etsy artisan!!!  I'll also be sharing the menu, some purchases from other amazing etsy artisans, and a few handmade gifts.

Friday, June 10, 2011

Baby Girl Shower Table Decor


Today is all about the baby shower table decor and how I did it....if you missed Baby Girl Shower Topiary DIY Tutorial or Princess Baby Shower PreView, go check them out.  For the most part, I made everything that I could on the cheap, purchased glass serving dishes, candy dishes, and vases from goodwill and yard sales.  I did however have a couple of splurges.

The top photo is of the the centerpiece on my daughter's table, who was of course the guest of honor (and I just had to share a couple of pics of her and her baby bump)
The fresh-cut flowers were one of my splurges.


We made up place seating tags only for her, the soon to be grandmother's,  and the soon to be great-grandmother's.  We made the tags using chocolate brown cardstock, folded in half, then pretty scrapbook papers in our color scheme, cut using lacey-edged scrapbook scissors which we then "glue-dotted" to the brown cardstock.  I picked up a brown caligraphy pen and wrote the names on these.  Sorry I don't have a close-up pic of the tags.
She chose to have her absolutely ah-maz-ing aunts, me and her sister-in-law, sit at her table... then each soon-to-be great-grandmother and her mother-in-law each had her own table and sat with their friends and family.

Thursday, June 9, 2011

Baby Girl Shower Topiary DIY Tutorial

I had planned to upload the baby shower invitation and share with you the online site where I made them, but alas, my puter woes continue....for some reason my wireless printer/scanner/fax is no longer communicating with my router....hubby will have to add this problem to his "honey-do" list.

So instead, today I'm sharing the topiary tutorial.  First I went to our local pottery shop, Zanesville Pottery and China in Zanesville, Ohio and purchased the 6x6 concrete pot.  The next stop was Hobby Lobby (love that store) and purchased more glue sticks, floral foam, a bag of moss,  a 6" foam ball and curly willow branches (I used 4).
I love how the pot as an aged, antique look to it, and I needed something that was heavy to support the height I wanted so this one worked really well. 
The flowers are white peonies, I used the full blooms, the buds and a few leaves.  I already had them from Michael's.

I removed the moss from it's bag and filled my sink with warm water, pushed all the moss down into the water until the bubbles quit coming to the surface and let it soak for about an hour (this really rehydrates the moss and plumps it back up to normal).  Then I drained the water and let the moss drain for another hour in the sink before laying it all out on dishtowels to dry overnight.
Hubby made a hole in the 6" foam ball and I hot glued the curly branches into it, then cut the floral foam to fit into the pot, making a hole in it as well for the bottom of the curly branches (this is the one thing I should have done better, it needed more stability).
I then pulled all the blooms, buds and leaves off their stems and proceeded to hot glue them to the 6" foam ball.  When that was finished and the moss completely dry, I pulled to moss sections apart to fit around the top of the floral foam at the base of the curly branches.

My plan was to place the topiary on the gift table, then my daughter could take it home with her to be part of the nursery decor.  When she saw it, she loved it but wanted a bit of pink added to it.  So I glued some pink geranium blooms in a few places, then we decided to add a couple of blooms to the moss to look as though they had "fallen" from the top. 
We were all very pleased with how it turned out, but getting it to the shower was a challenge, I did not have it stable enough in the base and we had to do some repair work at the shower.
The baby shower was held in the basement of our church and since there was no air-conditioning (and it was HOT), we had to use a couple of fans which really helped , but as you can see in the following photo, our poor topiary that had been through quite an ordeal getting to the shower, was starting to lean.
We also used a few large white ostrich feathers (also purchased at HL when they were 50% off as they were expensive) placed them in pretty glasses on different tables, and the fans of course made them lean as well. 

Wednesday, June 8, 2011

Princess Baby Shower PreView

Well, I'm finally back with a sneak peek of my daughter's baby shower (which is what has kept me so busy for the past two weeks)!!!
All the decorations were made, the guests invited and arrived, and gifts were opened with appropriate "ooh's" & "aah's" uttered...


And with my first blog post, blogger is already giving me grief....ugh. What the heck! I can't change the font to the one I like...oh well, here goes anyway... I plan to add a couple tutorials on decor items that I made in future posts. I'll also include some links for items that were purchased from some more amazing etsy artisans, so maybe you'll get some ideas if you are planning a baby shower in the future
I still don't have all the pics edited, and today is another busy day, so let me just give a quick shout-out to the absolutely fabulous women in my family that helped make everything come together exactly as I envisioned it...
My
Mom Jeanette
Mom-in-Law Joy
Sister Amy
Sis-in-law Kelly
Sis-in-law Kim
Miranda's Sis-in-Law Abby
(my sis-in-law Christine would have loved to help, but works full time, has a new baby of her own, so I'm thanking her anyway just cause I want to)
 
 
and I can't leave out
Miranda's BFF Hannah for taking the pics so that I could enjoy the shower
 
 
andddddd my son-in-laws family that took the time to stay afterward and help with the clean-up....ALL of you ROCK!!!!!!!
 
 
If anyone has any advice for me on how to deal with the probs I'm having with blogger, I'd love to hear it!!!!!!!!!!!!!!!!!!!!!!!!!!!!!!!!!!!!!!!!!!!!!!! (I normally upload my pics, then add the text....could this be the problem???)
Weekend Bloggy Reading

Saturday, March 19, 2011

My 1st Wreath Craft...& new Etsy item Listing

I previously posted about this afghan in my new series "What's on my needles...(or hook)". It was commissioned by etsy seller Nikki of Bond Girl Creations 26, and she loved it. Here's what she said in her feedback...
"Such a pleasure to work with...she bent over backwards to make me exactly what I wanted and the blanket is simply gorgeous and such high quality! The packaging was exceptional too! :)"
What wonderful compliments! Thank you Nikki.

I've decided to offer it for sale in my etsy shop, the new listing is here. It will be a CUSTOM order, which means I will make it to suit the buyer after they purchase it. I'm also writing up the pattern for possible sale too, (haven't yet decided if I want to do that).

I call it Nature's Gradation as I made it using all Earth Tones and it graduates from the darkest color at the bottom to the lighest at the top. I also made it out of organic cotton yarn in a very open design crochet so that it can be used all year round. One of the best things about using cotton is that it just gets softer and softer with use.


And here is my very first door wreath!!!! I was so excited when I finished it, that I just had to share.

I've never considered myself a "crafty" person, to me knitting and crocheting are skills that I've learned, but when I was watching Martha Stewart a few weeks ago, they made the cutest little oval wreath and I had a very strong urge to give it a try (they made it look sooooo easy, and it really is).
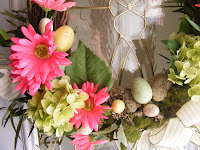

I really liked the little one they made but I wanted a big one for my front door, and I wanted it decorated more for easter. So, first thing I had to do was take to a trip to Hobby Lobby (all their wreath making supplies and flowers were 50% off, yay). So now I have what I need to make more in the future (cause, yeah, I enjoyed it so much I'll probably be making one for every season)...

But for this one I purchased a large round grapevine wreath

some dried eucalyptus

light pink gerbera daisies, hot pink gerbera daisies

chartreuse hydrangeas

a very small bag of dried moss that had a nice variety

a bag of plastic easter eggs in assorted sizes (all the easter decorations was 50% off as well, double yay)

thin gauge wire

pins

and wide green and white stripe roll of ribbon (also 50% off, yayyayyay)

And my mom (who is one of those people that can do anything she sets her mind to) came for a quick visit, so I roped her into helping me...THANK YOU MOM!!!!

First step was to soak the grapevine wreath in water, I did mine in the tub with a bath towel on top of it to keep it submerged, overnight. To make the wreath oval, I just used my hands and squeezed the top until it was the shape I wanted.

Next I used some shears to cut away some of the grapevine along the small end of the oval (which was going to be the top of my wreath) along the outside edge just to get a more oval shape.

I started adding the dried eucalyptus by just sticking it into the wreath where I wanted it, then started adding the flowers the same way.

I left space at the bottom to attach the moss which we had soaked to rehydrate (because I wanted living moss not dried)...and WOW, that teeny tiny bag of dried moss completely covered my center kitchen island once it plumped up! I attached it using the floral pins just shoved down into the grapevine.

Next job was to attach the easter eggs using my hot glun gun.

Last, we made the bow (going to have to get some bow-making lessons from my sister-in-law Kelly), but I think we managed to make it presentable.

To keep the moss alive, all I have to do is keep it spritzed with water! I LOVE it! And mom and I had so much fun making it. I'm already thinking about the ones I want to try for the other 3 seasons...

I would recommend going to http://www.marthastewart.com/ for the full tutorial, I'm sure it's much more detailed.

Can you see who's peeking out at the bottom of the door, and I don't mean my reflection taking the pic???

Linked to: BetweenNapsOnThePorch check it out for other before and after ideas AND Swing Into Spring Party at DIY by Design Blog